How do you snap an object
Move the pointer over the object until the snap point becomes highlighted. Drag the object close to the target object until the snap point on the target object becomes highlighted. To snap an object as you draw it, drag in the drawing window until the snap point in the target object becomes highlighted.
How do I change the snapping in PowerPoint?
- Click the View tab in the Ribbon.
- In the Show group, click the dialog box launcher on the bottom right corner of the group. A dialog box appears. …
- Uncheck Snap objects to grid. …
- Click OK.
Can I lock an object in PowerPoint?
To lock an object in PowerPoint for Windows, users will need to right-click the shape and then select the “Lock” option available in the context menu. Finally, users will be able to unlock any object by heading to the Selection pane and clicking the “Unlock” icon available next to the object name.
How do you keep a shape from moving in PowerPoint?
To lock a shape or object in PowerPoint, users can go to Selection Pane (under Shapes) and select the “Lock” option, or right-click over the object to lock and then click Lock option, which is available in the context menu.How do you snap objects in Word?
- Select a chart, picture, or object in the document.
- On the right end of the ribbon, select Format > Align > Grid Settings. The Grid and Guides dialog box appears.
- Turn on one or both of these options: Option. Description. Snap objects to grid when the gridlines are not displayed.
How do I group pictures together in Powerpoint?
Press and hold CTRL while you click the shapes, pictures, or other objects to group. You will need to select more than one shape, picture or object in order to enable the Group button. You can select all the objects on a slide by pressing CTRL+A. Select the Arrange button and choose Group.
How do I set object snap tools?
From the pull-down menu select Tools Drafting Settings… and when the dialogue box appears, click on the Object Snap tab to display the Object Snap settings. Check the boxes against the Center and Endpoint osnaps if they are not already selected.
Can you lock a text box in PowerPoint?
Using a textbox enables you to lock a shape while leaving the text accessible for editing. If you want to lock both the shape and the text, converting your text box to a table or inserting a 1×1 table to hold the text (before locking) will result in both shape and text being locked.How does snap to grid work?
Snap to grid is a computer function used to organize files or images automatically. It uses an invisible grid to line up the items on the screen along perfect horizontal and vertical lines.
How do I lock an object in PowerPoint 2020?To lock the shape you just inserted, right- click it and then click Lock on the shortcut menu, or click the Selection Pane button on the Shape Format menu, and then click the Lock icon to the right of the object name. To unlock, click the Unlock icon to the right of the object name in the Selection pane.
Article first time published onHow do you anchor an image in PowerPoint?
Back at the “Home” tab, click the “Arrange” button. A dropdown menu will appear. In the “Group Objects” section, select “Group.” The selected objects will now be grouped, successfully anchoring the image to your text.
How do you snap in Publisher?
On the Arrange menu, point to Snap, and then select an option. Select the object you want to move. Selection handles will appear around the object. Drag the object until its edge snaps to the guide, object, or ruler mark that you want the object to align with.
What is the shortcut command for a snap?
ActionWindowsCopy Snap/SnapsCTRL + C (when Snaps selected on the canvas)Paste Snap/SnapsCTRL + V Snaps are pasted wherever the mouse cursor is on the canvas.Delete Snap/SnapsCTRL + Backspace (when Snaps are selected on the canvas)Select all Snaps in current PipelineCTRL + A
How do I get auto snap?
- On the Status Bar, right-click on snap mode Find and select Snap Settings.
- In the Drafting Settings dialog box, Snap and Grid tab, click Snap On.
- Under Snap Type, make sure Grid Snap and Rectangular Snap are selected.
What is snap object?
Object snaps provide a way to specify precise locations on objects whenever you are prompted for a point within a command. For example, you can use object snaps to create a line from the center of a circle to the midpoint of another line. You can specify an object snap whenever you are prompted for a point.
How do I group pictures and text in PowerPoint?
- In Normal View or Slide Master View, Shift-click or Ctrl-click the pictures, shapes or other objects you want to group.
- Press Ctrl + G. The selected objects will be grouped together and have a single set of selection and rotation handles.
How do you combine objects in PowerPoint?
Select the shapes to merge. To select several objects, press Shift, and then select each object. On the Drawing Tools Format tab, select Merge Shapes, and then pick the option you want: Union: Turns all the selected objects into one object.
How do I merge pictures and text boxes in PowerPoint?
- Click Insert on the top nav bar. …
- Insert a text box on top of the photo and enter your text.
- Click Format and select both shapes by holding Ctrl and clicking. …
- Select the Intersect tool from the Merge Shapes menu, and voila, your text will be filled in with your background image.
What is difference between polar snap and grid snap?
Right-click to choose between grid snap and polar snap, or to access grid and snap settings. When grid snaps are turned on, the cursor snaps to rectangular grid intervals. When polar snaps are turned on, the cursor snaps to specified distances along specified polar alignment paths. Snap is turned on.
What is Snap to Grid Mac?
Snap to Grid: The desktop has an invisible grid that can be used to snap items you drop on the desktop to. This keeps all the desktop items evenly spaced and can prevent items from being cluttered or appearing on top of each other.
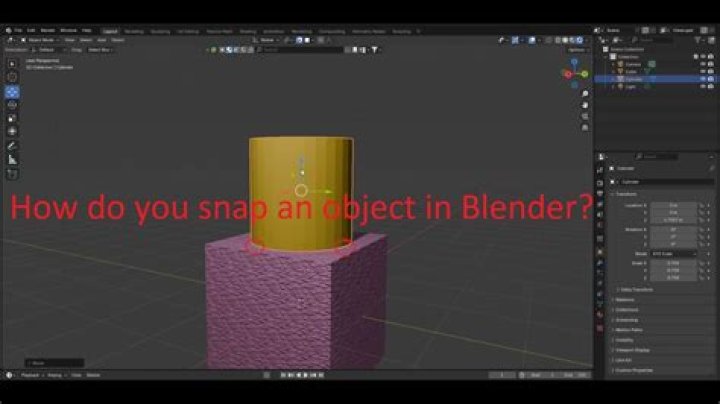
How do you snap to grid in blender?
Mode:Object, Edit, and Pose ModeMenu:Object/Object type ‣ SnapHotkey:Shift-S
How do I make objects snap together in unity?
- Assign tag “parentblock” to the object you are dragging around.
- Attach a trigger collider to both the parent object and the snappable child object.
- When the the dragged object enters the collision area, snap it to the parent.
- Store the offset from the parent to maintain its position once snapped.
How do you snap items to each other in unity?
Press and hold the V key to activate the vertex snapping mode. Move your cursor over the vertex on your Mesh that you want to use as the pivot point. Hold down the left mouse button once your cursor is over the vertex you want and drag your Mesh next to any other vertex on another Mesh.
How do I enable snap in unity?
Snap objects when moving, rotating or scaling by holding CTRL (PC) or CMD (Mac). Also use V to snap Vertices together.
How do you make a text box stay in PowerPoint?
- Select the text box and Right-click the text box and choose Format Shape. …
- Click the Text Box category.
- Choose an AutoFit option: Do Not AutoFit, Shrink Text on Overflow, or Resize Shape to Fit Text and then click the Close button.
How do you keep a text box from moving in PowerPoint?
Click on the “AutoFit Options” button to view the available options. In this example, the “AutoFit Text to Placeholder” option is selected. To turn AutoFit off for the active text box and allow text to move beyond the placeholder border, click “Stop Fitting Text to This Placeholder.”
How do you put text on a picture in PowerPoint?
- Select the text on the slide.
- Go to Drawing Tools Format.
- In the WordArt Styles group, select the Text Fill dropdown arrow and choose Picture.
- In the Insert Pictures dialog box, choose one of the options to insert a picture: From a file, Bing Image Search, or OneDrive – Personal.
How do I lock text in a picture in PowerPoint?
- Start PowerPoint. …
- Scroll through the slides on the left until you have located the picture you wish to lock. …
- Right-click on the picture. …
- Click “Lock aspect ratio” located in the middle of the dialog box.
- Click “Close.”